Setting up the Header
Table of Contents:
1. General Info
2. Sticky Header
3. Adding Logos, Logo Sizing & Settings
4. Global Header Layout
5. Custom Header Layout
5.1. Transparent Header
6. Changing Header Color over Slideshows
1. General
The main tool to build the Header area on the site is located in Flotheme -> Header. From here, you can set a Global Header that will be applied to all existing pages, posts, galleries.
1. Desktop Header Layout
Each theme includes a certain selection of predefined Header Layouts to choose from.

2. Desktop Header Options
Once you’ve selected your Header layout, proceed to the next tab – Header Settings. There you can customize your logo settings, sticky header options, size of your header, fonts, colors, etc.
These options may slightly change based on the layout you select in the first tab.
A couple of important options to keep in mind:
- Sticky Menu
- Header Spacing located under Desktop Header.
- Logo Options
- Mobile Header.
2. Sticky Header
Sticky Header – Enabling a sticky header on your site will mean that when the user scrolls down your page the Menu is locked to the top of the page at all times.
To enable the sticky header, you can turn it on under Flotheme – Header – Desktop Header.
Don't forget to customize the colors & background opacity if needed.

3. Adding Logos, Logo Sizing & Settings
Requirements:
- PNG Image with transparent background
- max-width 500px
- A max file size of 150kB.
To upload the image, go to one Flotheme > Header > Desktop Header > Logo Options
Then choose the option for image logo, and upload both a dark and light logo, we recommend using photoshop to invert the colors if you're not using a colorful logo.
![]()
4. Global Header Layout
What's important to know is that you have an option to use the same Global Header across all pages, or you can create custom headers on specific pages.
This can be done with the help of the Header Placeholder, which allows you to position the element wherever needed and/or to enable/disable custom Header option.
If you don't want to use a Header on a page, you just need to delete the placeholder.
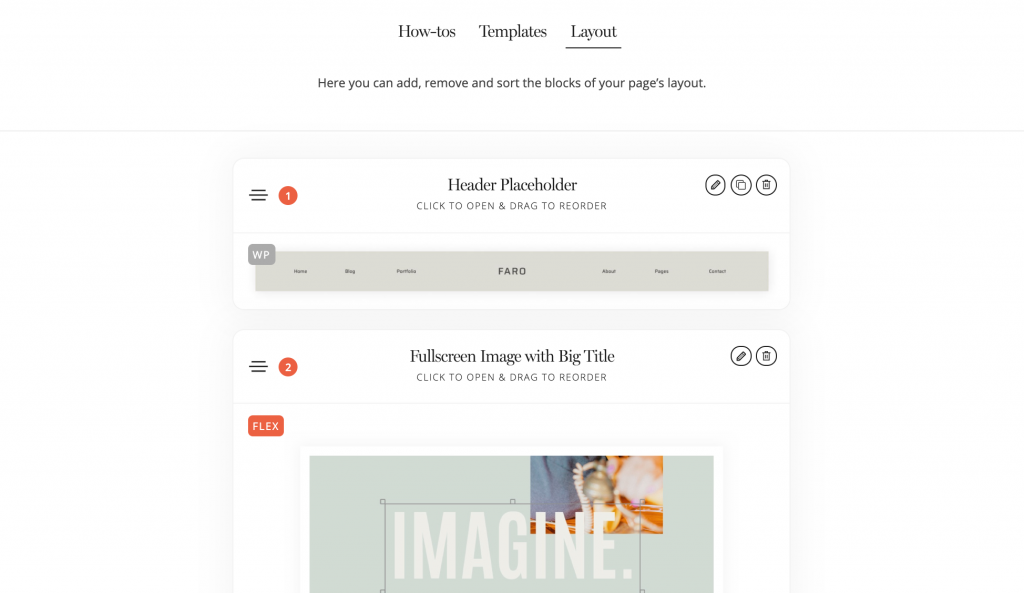
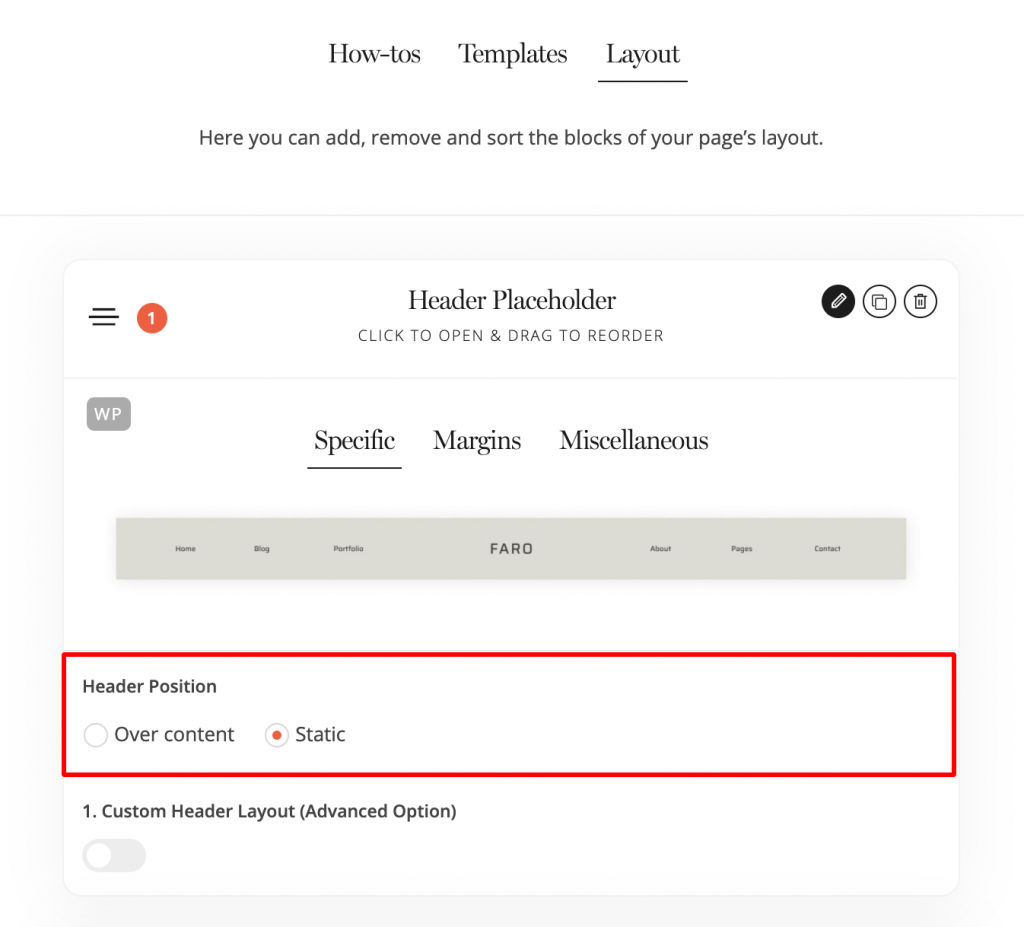
The header placeholder block allows you to also use any of the Header Positions: Over Content or Static.
The default positioning for the Header Placeholder is “ Static”.
With a “Static” position your header will be placed on top of the block.
With an “Over content” position your header will overlap the next block below the header. The “Over content” option is useful for cases when the header needs to overlap a Flex Block below it, e.g. a cover image, as you can make the header transparent. Check Custom Header Layout section below for more info.
5. Custom Header Layout
To enable a Custom Header, you need to enable this feature within the page back-end.
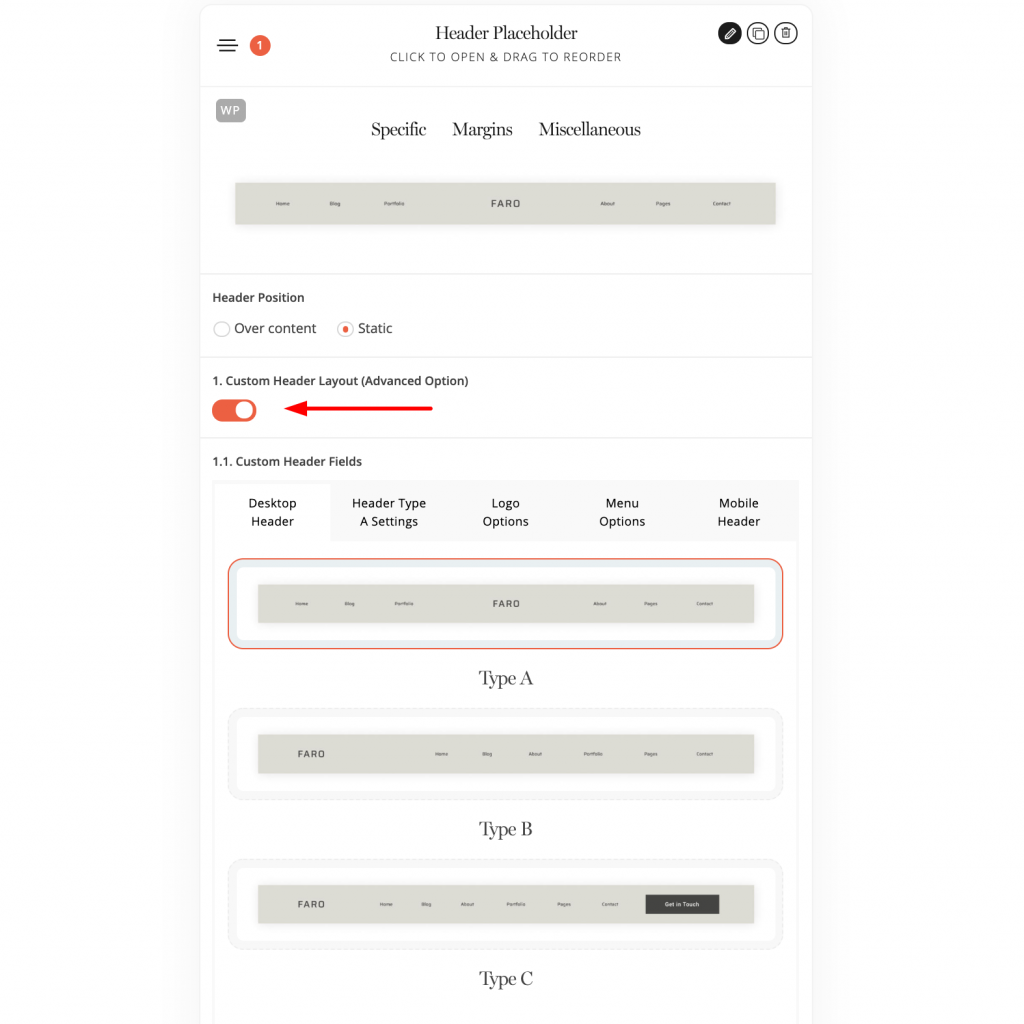 Overall, the options to customize a Custom Header are identical to the ones located in the Flotheme - Header Settings.
6. Changing Header Color over Slideshows
When using a Slideshow block you can merge your header with the slideshow to enable a transparent Header.
In this case, you have an option to customize the colors of your slides.
It’s important to note that these settings are located within the actual Image Slide you uploaded into the Slideshow. For each Slide you need to assign a Text Color, otherwise, the default color will be applied.
Change the Elements Color within the Image Settings, and this will change your Menu and all other text, or Social Icons over this image.
If you’re stuck or unsure about a certain step, please reach out to us via our Facebook Community.