Setting up the Footer
Table of Contents:
- Footer Overview
- Instagram Area
- Flexible Area
- Copyrights Area
- Widgets Area
- Global Footer Block
- Custom Footer Layout
- Removing FloThemes credits icon with Flo Footer Credits plugin
1. Footer Overview
Footer – a small block of the content located at the bottom of your website. Most of the time this area includes Social Media Links, Copyright texts, etc.
To manage your Footer content go to Flotheme – Footer section.
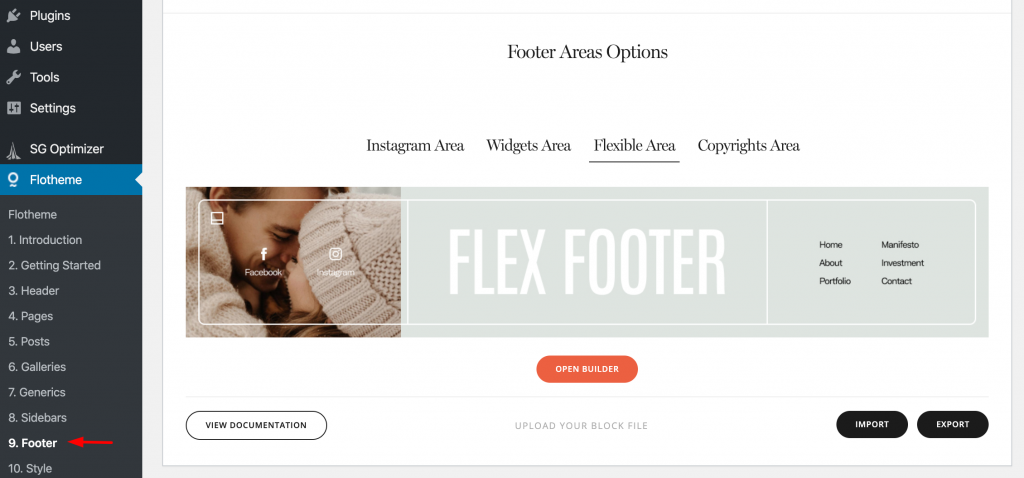
The Footer includes 4 sections: Instagram Area, Widgets Area, Flexible Area, Copyrights Area. But it's not mandatory to use all areas.
Having the Footer broken down into multiple sections, allows you to re-order the Footer structure, or use only the areas you need.
Add, remove, drag, and drop the Footer Areas as needed.
Each area has its own set of settings that may include font, color and text adjustments, etc.
2. Instagram Area
– The Instagram Area is an important component of the website Footer.
Flexthemes offer 2 different types of Instagram Feeds:
1. Created with Uploaded Images
2. Created with a third party plugin like Smash Ballon
With option #1 you can manually upload images to your Instagram Feed.
If you decide to have a live Instagram Feed select option #2. For a more detailed overview please refer to the following article.
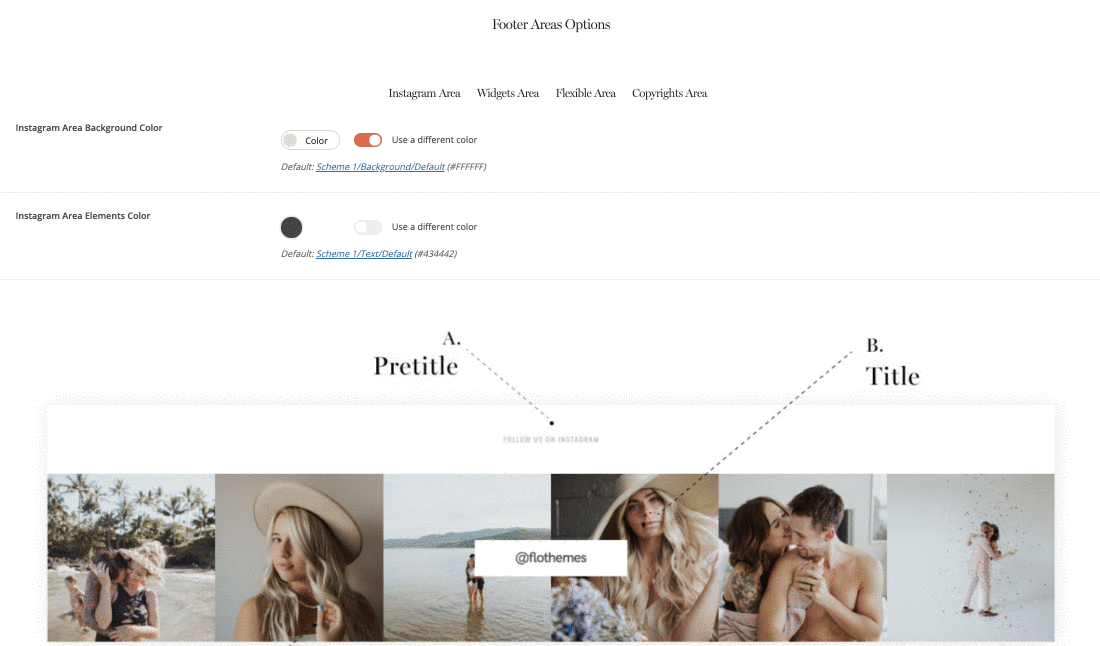
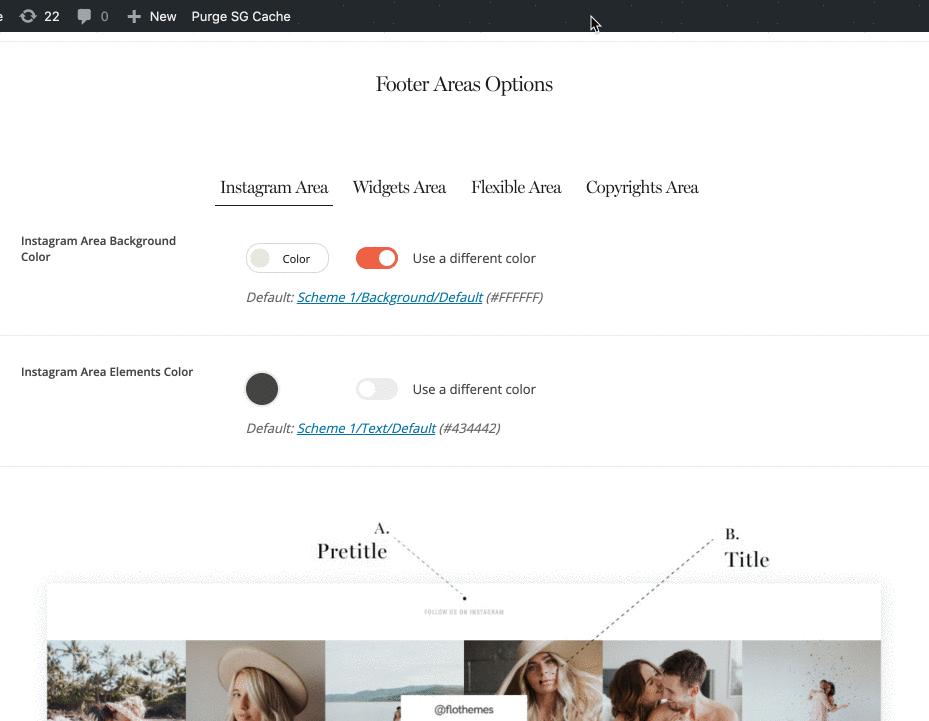
For your Instagram Area you can adjust the following:
– Background Color
– Pretitle & Title Texts
– Elements Color (Pretitle & Title colors)
– Pretitle & Title Fonts
– Title Position (Above or Over the Images)
– Images Source (you can create your Instagram Feed using Uploaded Images or another third party Plugin)
– Image Count for your Instagram Feed on Desktop and Mobile
– Image Gap for your Instagram Feed on Desktop and Mobile
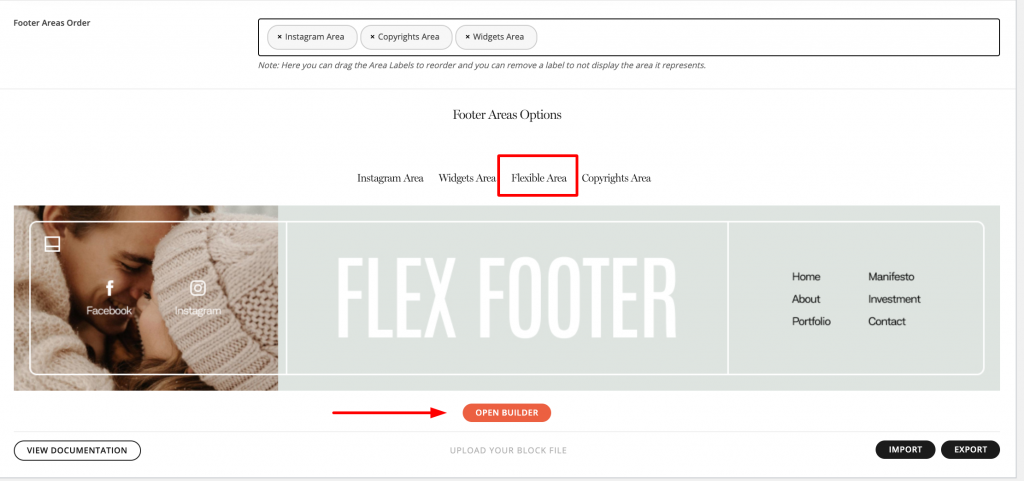
3. Flexible Area
– The Flexible Area is your Flexblock builder – you can create a block from scratch or use a pre-made template as a base, and basically add anything you want into your footer. Even export/import json files of existing blocks you’ve created for other pages.
It is important to add the Flexible Area to the Footer Areas Order in order to have it active on your site. Otherwise, it will not be visible.
NOTE: If you have a Custom Style Kit enabled on a specific page, the colors and fonts will be inherited from this specific style kit, not the one from your Global Style Kit.
4. Copyrights Area
In this area you can change your Copyrights Area Layout:
choose one that has a menu, your social media links or a back to top functionality.
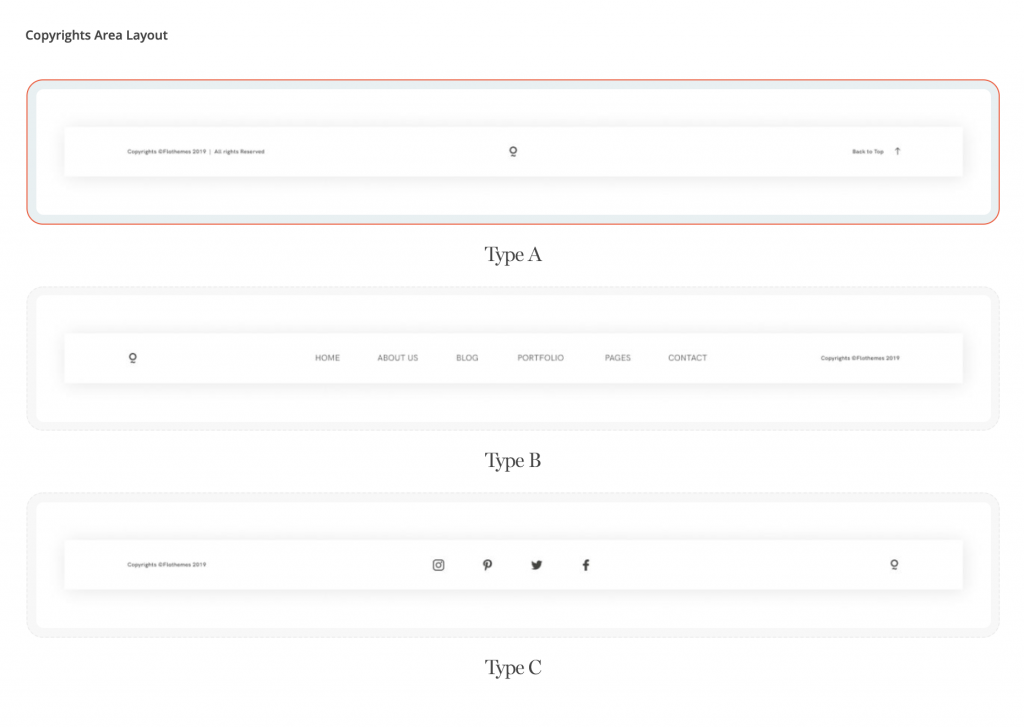
The settings you can adjust for your Copyrights Area depend on the selected Copyrights Area Layout and can include changing the following:
– Background Color
– Elements Color
– Copyright Notice (the text)
– Copyright Notice Font
– Enable or hide Social Media Links
– Enable or hide Scroll to Top Button
– Scroll to Top Label
– Scroll to Tob Label Font
– Enabling a Footer Menu or Choosing a Custom Footer
– Footer Menu & Dropdown Menu Fonts and Colors
To edit your Social Media links go to Flotheme – Generic – Social Media and refer to this tutorial.
To create a Footer menu go to Appearance – Menus and refer to this tutorial.
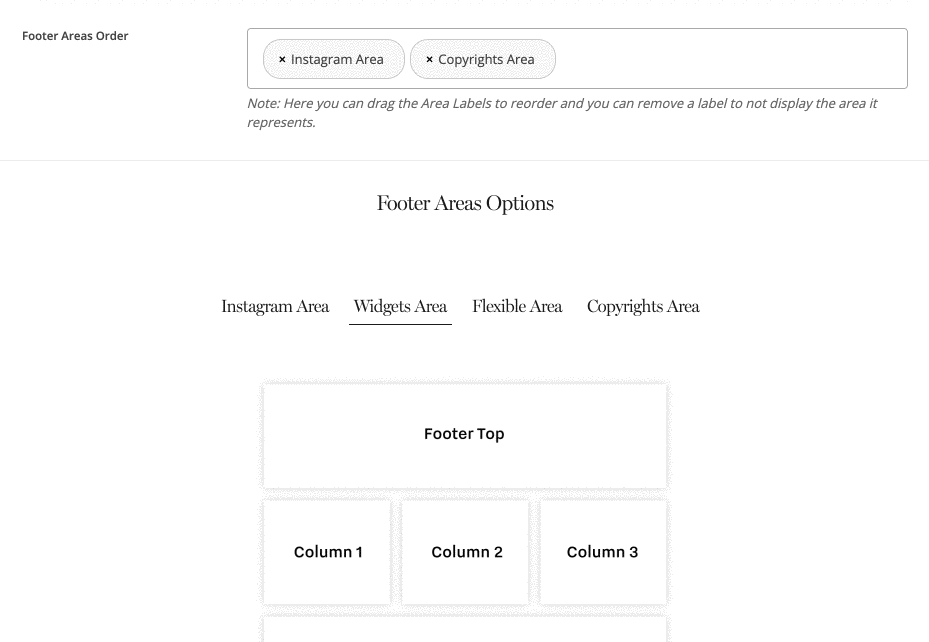
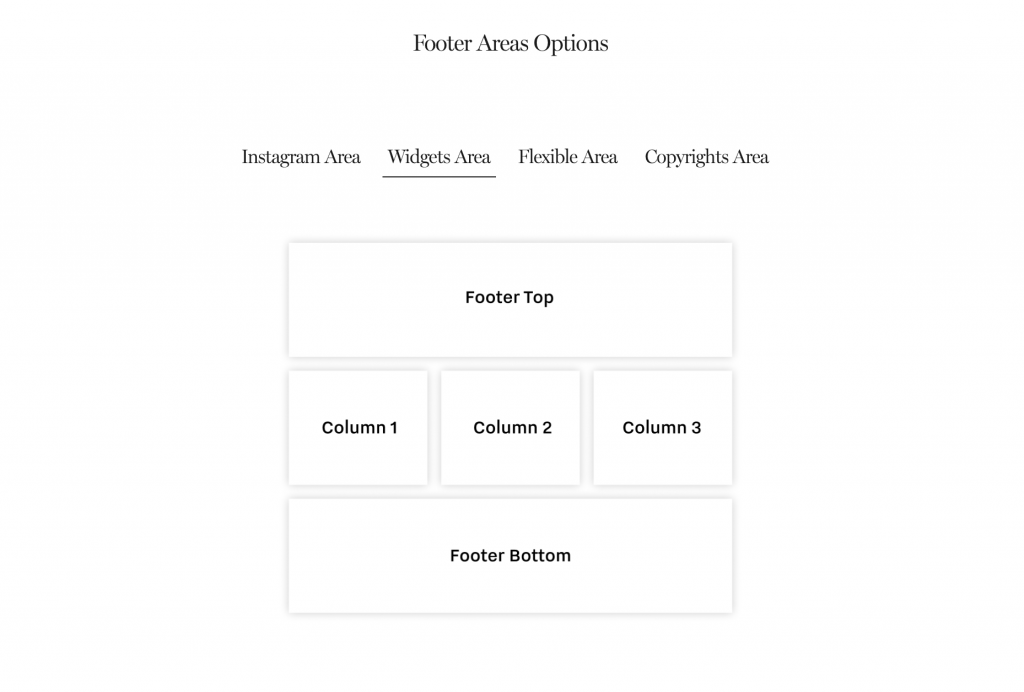
5. Widgets Area
With this area, you have a certain number of widgets in your dashboard that you can add to your footer Widget Area – menus, text, categories, HTML, etc.
There are 5 primary sections where widgets are added:
– Footer Top
– Column 1
– Column 2
– Column 3
– Footer Bottom
Step 1: Add content to the Widgets Area. This is done from Appearance – Widgets.
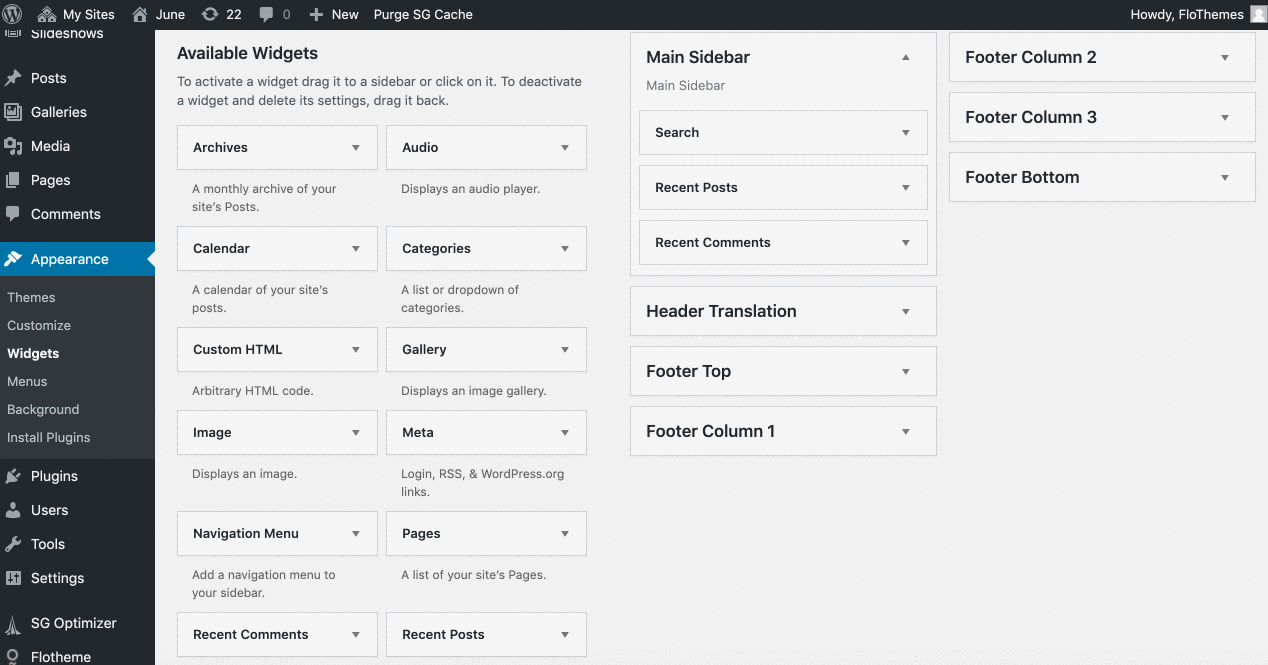
Step 2: Customize your Widgets Area. Design changes (colors, fonts) are done from your Flotheme – Footer section.
For your Widgets Area you can adjust the following:
– Background Color
– Widgets Title Fonts
– Widgets Title Color
– Widgets Content Font
– Widgets Content Color
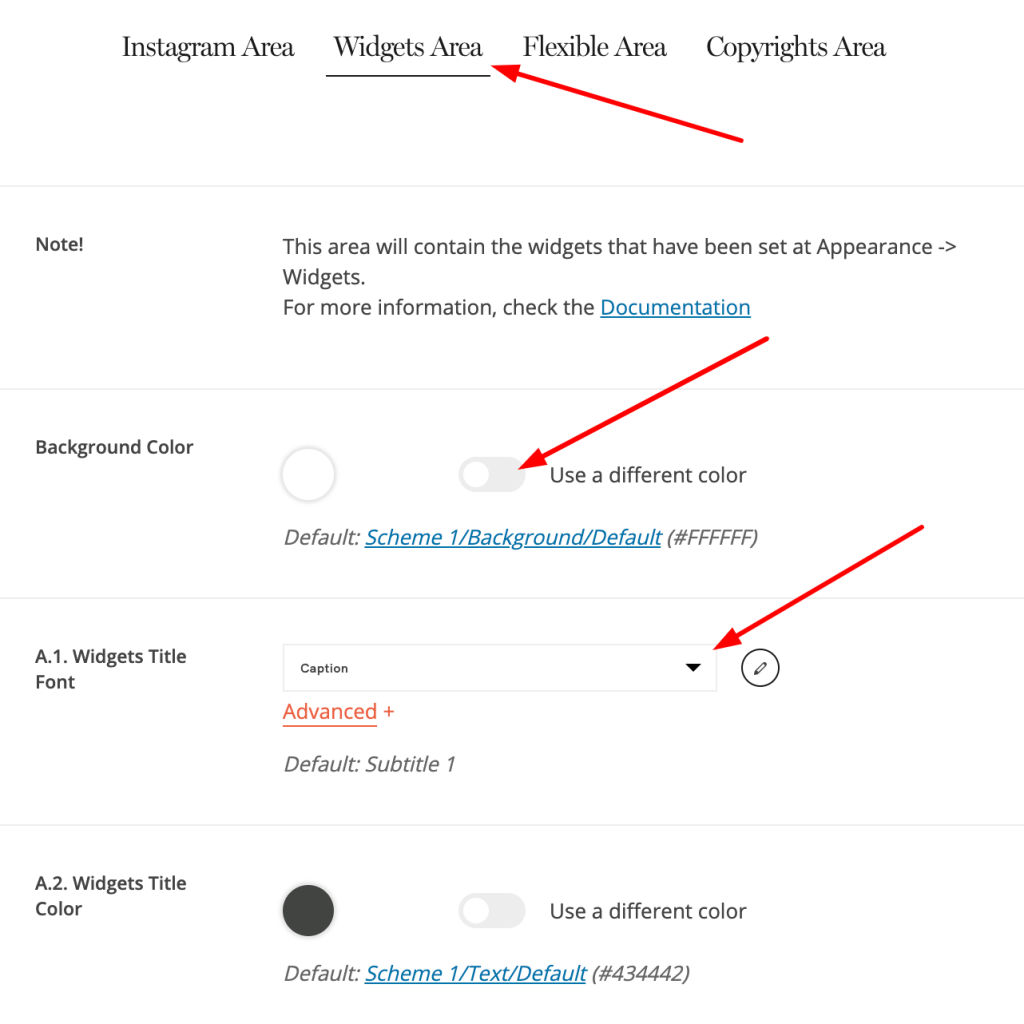
It is important to add the Widgets Area to the Footer Areas Order in order to have it active on your site. Otherwise, it will not be visible.
You can also use the Widgets Area with the Custom Footer Layout, it means you can create a custom Footer for one specific page and keep, remove or have a custom Widgets Area only for that page.
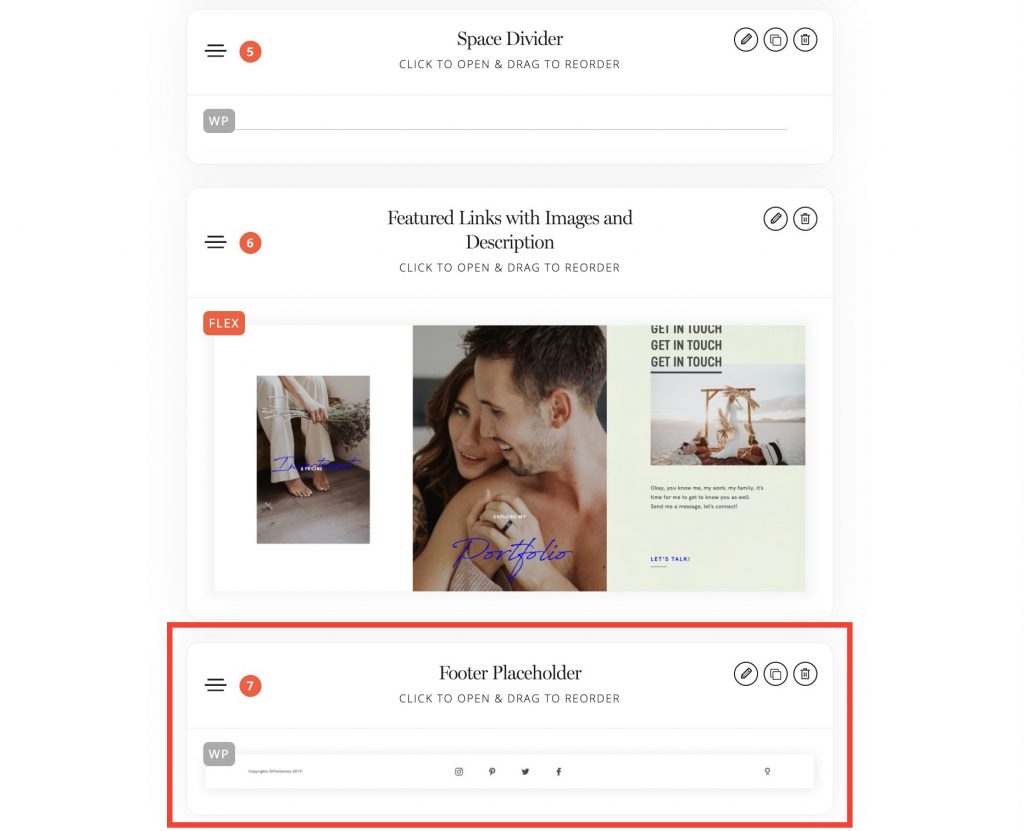
6. Global Footer Block
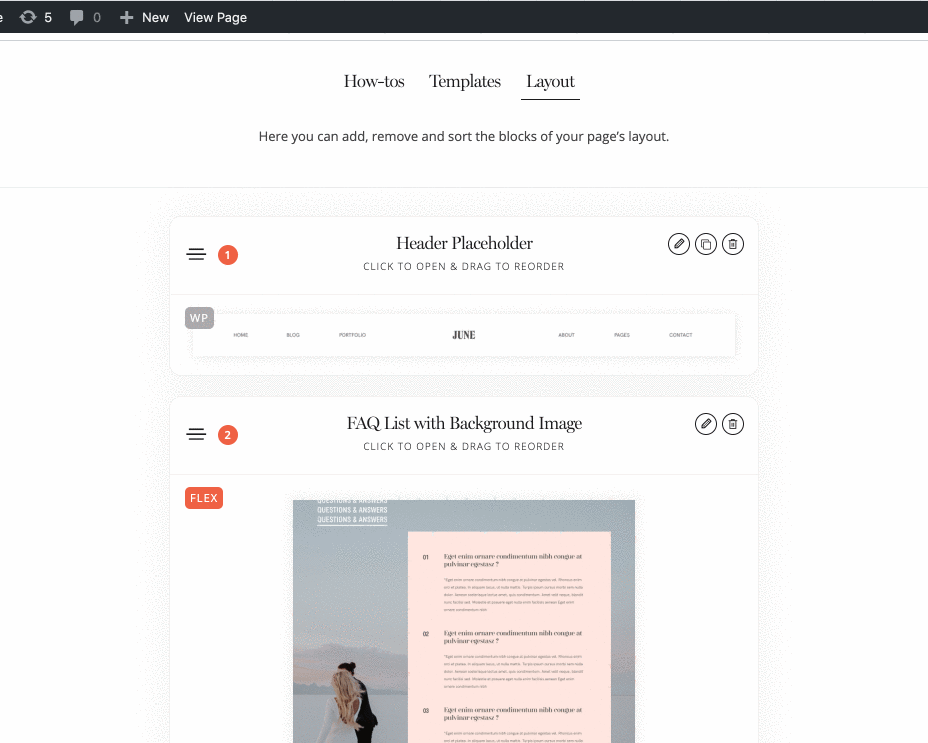
The Footer Placeholder block is added by default to all page templates and the settings are identical to the ones located in Flotheme – Footer section, therefore you are not required to add content to it every time a page is being created.
You build your Footer in Flotheme – Footer section and a Footer Placeholder is added to all your Pages.
By default, this block is always “stuck” to the bottom of your page back-end. So if you add new blocks they will appear right above the Footer Block thus keeping the footer in place at all times.
Since Footer Placeholder is a standalone block, it allows you to:
- move the footer block.
- remove the footer block from a page: In case you require to have a page that you send to your clients privately (for example, pricing page), you may want it to look separated from the site and have no navigation to the site. In this case, you create page as you normally do and remove the header and footer from it.
- use a custom footer on certain pages: This is a great option to have a different footer on some pages, like galleries for example. You may have a pretty big footer area that will look amazing on all pages, but on galleries pages, it may consume too much space or attract too much attention. In this case, in the Footer Placeholder block, you may click Custom Footer Layout and create a new footer only for the page. The same can be allied to Global Post Layout or Global Gallery Layout to set up a different menu for the whole Blog or Portfolio area.
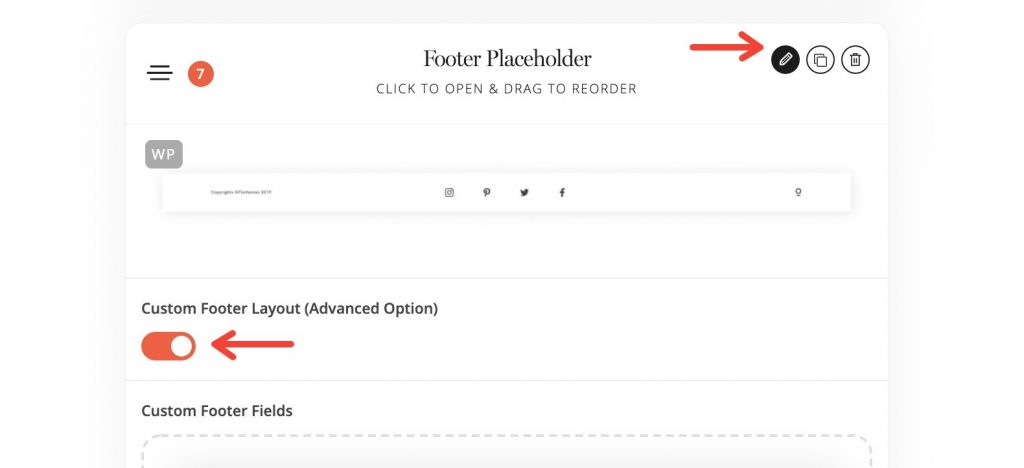
7. Custom Footer Layout
Creating a Custom Footer is not something you require on a daily basis, however, it is good to know how to use this feature if the need comes around.
Enabling this feature, allows you to create a custom Footer for a specific page, or remove the Footer completely if it is not required.
To access these, you are required to enable this feature within the page back-end – in the “Footer Placeholder” block you need to enable the options Custom Footer Layout and create the new footer.
The options to customize a Custom Footer are identical to the ones located in the global footer area Flotheme – Footer Settings.
The only real difference is that the settings applied in the Custom Footer area will affect only the page it is being applied in (or the Global Template if you are applying the Custom Footer in Flotheme -> Posts -> Global Post Layout or Flotheme -> Galleries -> Global Gallery Layout).
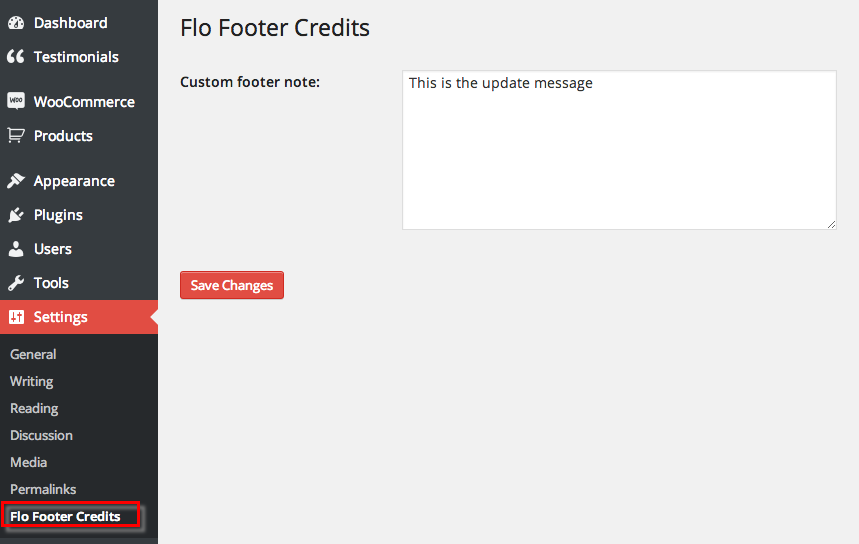
8. Removing FloThemes credits icon with Flo Footer Credits plugin
There is a plugin that will help you to remove it.
All you have to do is to get the Flo Footer Credits plugin and install it. After the plugin is installed the footer credits will disappear. The only steps that are required here are to install a plugin and activate it – the plugin activation will automatically remove the icon.
If you want to add something else instead of FloThemes credit icon, for example an icon or link, you can do that by editing the Flo Footer Credits option.
If you’re stuck or unsure about a certain step, please reach out to us via our Facebook Community.